|
|
|
|
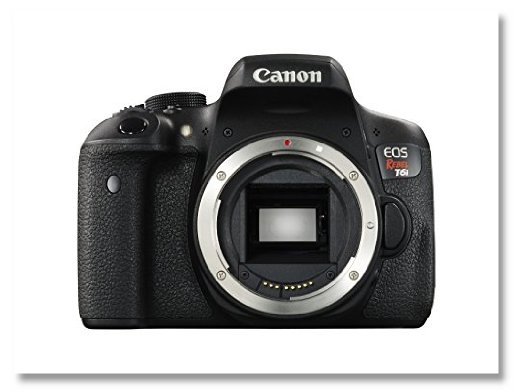
Canon EOS Rebel T6i Digital SLR (Body Only)
|
|
By Canon
|
 (51 Reviews) (51 Reviews)
|
|
List Price: $749.00
|
|
Our Price: $549.00
|
|
$200 (27%)
|
|
|
Availability:
|
Available for immediate delivery.
|
|
Manufacturer:
|
Canon
|

|
|
|
| |
Most Helpful Customer Reviews:
Add Your Own Review |
 Five Stars, January 30, 2016 Five Stars, January 30, 2016
By David R
|
|
Awesome
Was this review helpful to you?
|
|
|
|
 Can't Take Picture Over Wifi, Sort Of, January 28, 2016 Can't Take Picture Over Wifi, Sort Of, January 28, 2016
By John E. Perkins
|
|
Update 1.30.16: Added stuff about remote shooting.
Update 1.29.16: Notes added to bottom of review.
Camera fails in one of its basic features- wifi. The thing I want to do, the thing I expect as a basic feature of a camera advertising wifi connectivity, is to take a picture without a wired connection and have that picture appear on my computer automatically. The T6i does not appear to do this. It's like having a car that only works in 3rd gear on Sunday afternoons. I was able to get the camera to connect to my computer over wifi, but I couldn't leave the menu page inside the camera without turning the connection back off. I was able to get the Remote Shoot feature in the included program (Digital Photo Professional 4) to work, but only when the camera is connected by USB. The program does not sense the camera over wifi. I was able to get the camera to connect to my cell phone by wifi. I'm rating this as 2 stars instead of 3+ due to the lack of a basic feature, and 2 stars instead of 1 because the camera works fine other than the wifi.
Update: Bumped up to 3 stars. Figured out how to add web services (email and Facebook as a test for me). Camera has to be plugged in to computer by USB and I had to be logged in to Canon Image Gateway online. I'm still not entirely happy because I have to go into the web services menu and tell the camera to upload to a given service. I might bump it to 4 or 5 stars if I can get the Canon Android app to automatically save pictures to a folder on my phone (ex: Dropbox) that would automatically upload the picture.
I don't expect to ever be in a confrontational situation with my camera, certainly not with law enforcement, but here's an example of what I want to be able to do with the camera's wifi feature. Let's say I'm the guy with the camera recording the Rodney King beating. I want to be able to go 'click,' take a picture, and know that that picture exists somewhere- with no further action on my part- other than the camera itself. Maybe I'm taking pictures/video of a natural disaster or some other situation where the SD card, the camera, or even I might not survive the encounter.
*****Update 1.30.16:*****
*****Canon T6i, Setup*****
Do this first, before doing anything with the camera itself:
The CD "Canon EOS Digital Solution Disk," install everything from that. You should get "Digital Professional Photo 4" and "EOS Utility."
Charge the battery in the included wall charger. Orange light means it's charging. Green light means it's fully charged.
*****Canon T6i, Wifi Setup*****
You only have to do this once for each Wifi network:
Turn the camera on.
Press the Menu button (to the left of the viewfinder).
Use the up/down/left/right buttons around the Set button (lower right of camera back) and go to the first wrench page, the set "Wi-Fi/NFC" to "Enable."
Camera shows "Register a nickname..."
Click "OK"
Give the camera a name (I called mine "T6i"), then click "Menu/OK"
Camera shows "[OK] has been selected..."
Click "OK"
Select "Wi-Fi function"
Of the 5 symbols, select the last one, "View images on DLNA devices"
Select "Find network"
Click "OK"
The whole list of networks under "Select wireless network" will be highlighted (yellow box around it)
Click on that box to go into the list
Click on the network you want to use
Click on "OK"
Click on "Enter 8-63 ASCII characters"
Click on "OK"
Press the trash button on the lower left of the display (not the physical camera button on the lower right of the camera). This clears the default passwords (5 asterisks)
Enter your Wifi password
Click on "Menu/OK"
Under "IP address set" I left it on "Auto setting"
Click on "OK"
You may get "Busy...please wait" for a few seconds
Now you're in a screen called "Connection"
You can't exit this screen on the camera. You can go into "Confirm set" to view your Wifi settings, but the only way to back out of "Connection" is to select "Disconnect, exit" or turn the camera off, both of which turn the camera's Wifi connection off.
*****Canon T6i, Connect To PC Over Wifi*****
This will let you see the camera's memory card (the SD card) from your computer, over Wifi. It will not let you take pictures with the camera while the camera is connected to the computer by Wifi because you have to exit the Wifi menu in the camera in order to take pictures.
The camera has to be on and "Wi-Fi/NFC" has to be set to "Enable."
Open File Explorer (in Windows 10 it's the yellow folder icon in the bar at the bottom of the screen) (or click on the Start button then "File Explorer")
Click on "This PC" or (because I renamed it on my computer) "My Computer"
You should have 3 sections on your screen- "Folders," "Devices and drives," and "Network locations"
Under "Network locations" you should have "Canon EOS Rebel T6i"
You can click into "Canon EOS Rebel T6i", then "SD," then "100CANON," then "1-100" and your pictures should be there
Once you get into "SD," you're in the camera's memory card (an SD card), so you can copy, paste, do whatever you want, just like a USB thumb drive. You can put non-picture files there if you want, but you can't access them on the camera itself. You could save a Word file to the SD card with notes (#1-37 was our vacation, #38-57 was camping with kids, etc.).
*****Canon T6i, Remote Shooting, Smartphone/Wifi*****
I have an Android phone. The instructions below apply to the Android app only, not to the iOS app.
On your phone, install the free app "Canon Camera Connect."
On the camera, set "Wi-Fi/NFC" to "Enable."
Go into "Wi-Fi function"
Select "Connect to smarphone"
Click "Connect"
Under "Connect to device" click "ok"
On your phone, go into Settings >> Wifi
Click on the Wifi network T6i_Canon0A
Click on "CONNECT"
After it shows "T6i_Canon0A Connected," back out of Settings and start Canon Camera Connect
Click on "Remote shooting"
Click on the grey circle in the bottom middle of the screen to take a picture
Focusing- How to get the auto-focus button
Click on the box in the upper right corner with the 3 lines in it
Click on settings
Click on the check box for "Show AF button"
Click on the box in the upper right corner with the "x"
Now, below the large grey circle, there is a small grey circle. The small grey circle is the focus button. If you press that (hold it for a second or two), the camera will focus on whatever it's pointed at.
On the picture preview there's a box symbol in white. You can click wherever you want in the picture preview, then press the focus button, and the camera will focus on whatever the box symbol is centered on. If, instead of holding down the focus button, you tap the focus button, the camera's focus will move part way from what it was focused on to what it's trying to focus on.
Use the small grey circle to focus, then the large grey circle to take a picture.
When I was done using Canon Camera Connect app, I pressed the return button on my phone, then the Wifi symbol with the little "x" in the upper right corner of the app. The app said "Disconnect the camera?" I clicked "Yes." I backed out of the app. I turned my phone's Wifi off and then back on. My phone automatically re-connected to my home Wifi network.
*****Canon T6i, Connect By USB*****
On the camera, make sure "Wi-Fi/NFC" shows as "Disable." The USB connection won't work if Wifi is set to "Enable." If the camera is connected to the computer by USB and Wifi is set to "Enable," the computer won't see the camera.
If the camera is connected to the computer by USB, Wifi is set to "Enable" and you set Wifi to "Disable" in the camera, you have to either turn the camera off and back on or unplug and plug back in the USB cable for the computer to see the camera.
*****Canon T6i, Remote Shooting, By USB*****
Included with the T6i is a program called "Digital Photo Professional 4." One option in this program is "Remote Shooting," where you can press a button in the program, the camera will take a picture, and the picture will appear immediately in the program.
Connect the camera to the computer by USB, as described above.
There are 2 ways to get to Remote Shooting:
1) When the camera is connected to the computer, EOS Utility starts automatically. If not, you can start it yourself. One of the options on the first screen in EOS Utility is Remote Shooting.
2) Start Digital Photo Professional 4 and click on "Remote Shooting."
In Remote Shooting (windows says "EOS Rebel T6i") the dark grey round button in the upper right corner is the shutter button. If you hover over the button, the camera will focus on whatever it's pointed at. The flash may blink and the camera may make a slight ratcheting sound effect if you're inside- the camera needs the extra light to focus properly.
Click on the dark grey round button to take a picture. The picture is on the camera, not on the computer.
*****Canon T6i, Web Services*****
The Canon T6i can post to Canon Image Gateway, Facebook, Twitter, Flickr, Google Drive, and email., but you have to install each service to the camera, using the program EOS Utility (on a CD included with the camera).
You have to create a Canon Image Gateway account to use Web Services. You only have to do this part once, no matter which or how many web services you want to use:
Create an account with Canon Image Gateway here: [...]
Note: This will take you to [...] (this is the right place)
Here's how to set up Web Services. The general process is the same for each service, so I'm just explaining the process for Facebook.
You should already have an account with whichever service (Facebook in this example) you want to use.
EOS Utility should already be installed on your computer.
Connect the camera to your computer by USB.
EOS Utility should open automatically when you connect the camera.
Select "Camera Settings"
Select "Web Service Settings"
Enter the username and password for your Canon Image Gateway account.
After pressing the "Login" button, you'll get a window called "EOS Web Service Registration Tool (Version blahblahblah) - EOS Rebel T6i." On the left under "Camera" is what's actually on the camera. On the right under "Web Services" is where you set up each web service (Facebook in this example). You can remove stuff from the "Camera" column, but you can't remove stuff from the "Web Services" column.
Click on the little Earth grid icon by "Edit Web Services." You should get a window called "Web Service Settings."
To the right of "Facebook," click on "settings."
Change these settings however you want. Whatever you put in the box under "comment" appears as the description of the photo in Facebook.
Scroll down to the bottom and click on "set."
You'll get "when the privacy setting is wider than the Facebook setting, Facebook setting is applied. Are you sure?"
Click "ok."
Now you're back to "web service settings."
Click on "finish."
Now you're back to "EOS Web Service Registration Tool (Version blahblahblah) - EOS Rebel T6i." (it may be grayed out for a few seconds, just wait)
Under "web services" click on Facebook.
Click on the left-pointing arrow between "camera" and "web services."
Facebook should now appear under "camera."
Click on "ok."
*****Canon T6i, Posting To Facebook*****
Here's how to post pictures from the camera to Facebook.
You should have already set up Wifi (see "Canon T6i, Wifi Setup" above)
You should already have Facebook installed to the camera (see "Canon T6i, Web Services" above)
If the camera is plugged into the computer by USB, unplug the camera.
Set Wifi to "Enable."
Go into "Wi-Fi function"
Go into "Upload to Web Service" (the Earth grid icon)
Go into Facebook
If you have different entries like "T_L (Public)," "T_L (Friends)," select whichever one you want
Under "Upload to Web service" select "Connect"
Under "Connect to device" select "ok"
You'll get "Connecting...please wait" for a few seconds, then it will show one of your pictures.
If you want to upload just one picture do this:
Go left or right (using the buttons around "Set" on the camera body) and find the picture you want.
Click on "Set" (you have to touch "Set" on the camera screen)
Click on "Send img shown" (you have to touch "Send img shown" on the camera screen) (you can resize if you want, but I just use this option)
You'll get a screen that says "Sending 1/1..." while the picture is uploaded.
After the upload is done you'll get a screen that says "Images sent"
Click "ok"
The picture should appear on your Facebook account in Photos, but not in your News Feed or Timeline.
If you want to upload multiple pictures do this:
Go left or right (using the buttons around "Set" on the camera body) and find the first picture you want.
Click on "Set" (you have to touch "Set" on the camera screen)
Click on "Send Selected" (you have to touch "Send Selected" on the camera screen)
Go left or right to cycle through your pictures.
For each picture you want to upload, click on "Set" (touch "Set" on the camera screen). Notice the check box and the number of selected pictures in the upper left corner of the screen.
Once you have all of the pictures you want selected, click on "ok" (touch "ok" on the camera screen)
Click on "Send"
In my case I selected 2 pictures, so it says "Sending 1/2..." then "Sending 2/2..."
After the upload is done you'll get a screen that says "Images sent"
Click "ok"
The pictures should appear on your Facebook account in Photos, but not in your News Feed or Timeline.
*****Canon T6i, Auto-Posting To Facebook*****
I wanted to take pictures and post the picture to Facebook from the camera, but those pictures would show up in the Photos section of my Facebook page, but not in my Timeline or News Feed. I know I can go into my Facebook account and make those pictures appear in my Timeline/News Feed, but I want that to happen automatically when the pictures are posted by the camera, without me having to go into Facebook and do anything else.
I haven't found a way to do this. Here are my notes, for reference.
Tried changing "private information (such as people and locations) included with images" from "remove" to "do not remove." No difference.
Tried changing "Facebook share range" from "Sent to the timeline (Friends)" to friends and public. No difference.
Tried looking through menu structure on camera. Nothing to change.
In "Edit Web Services" on the PC I tried changing "Image transmission destination" to "Canon Image Gateway Only (a link to the album is sent to Facebook)." No difference.
Tried uploading several images instead of a single image, from camera to Facebook. No difference.
Added Twitter via "Edit Web Services," set Twitter to autopost to Facebook. No effect. Twitter just posts link (not image) to Facebook.
Tried to add Flickr via "Edit Web Services," but I get script errors when I go into Flickr settings. Selected "keep running scripts: Y." "We've noticed some unusual activity on your account," wants to send me a code by text, phone call, or email. I tried each one, but never received a text/call/email. Tried again, but made sure to de-select the "keep me logged in" check box. It worked that time, without asking me about unusual activity. Successfully uploaded picture from camera to Flickr, set Flickr (in browser) to auto-post to Facebook, but it didn't auto-post.
Tried to forward from Google Drive to Facebook. Unsuccessful.
Tried removing Canon Image Gateway from Facebook and Flickr settings in Edit Web Services to see if either would then auto-post to my Facebook timeline. Unsuccessful.
Was this review helpful to you?
|
|
|
|
 Four Stars, January 28, 2016 Four Stars, January 28, 2016
By malarict
|
|
love the camera!!!
Was this review helpful to you?
|
|
|
|
missing basic features like digital video zoom, January 27, 2016
By a
|
|
There are some strange missing features that don't carry over from the T6s, such as digital video zoom. I would think that's a simple software feature they didn't include in this model, only to make people spend more money on the T6s. I don't like that sort of business logic
Was this review helpful to you?
|
|
|
|
clean and amazing photos; both in auto and manual modes, January 25, 2016
By A Customer
|
|
Bought this as a replacement to my Rebel T3 which unfortunately went kaput after my curious 9 year old got to it on a vacation. I've had this camera for roughly a month now, and I am very impressed with it so far. Mine does not have the problems the earlier versions of the T6i did, so it appears Canon has corrected that issue.
The only problem I came across with this camera is that Lightroom 4 is not compatible with its RAW images, which is a bummer. I was planning on upgrade to Lightroom 6 anyway, but was forced to earlier than I had anticipated because of this camera. Be aware of that if you plan on purchasing this camera and you are utilizing older versions of Lightroom.
Other than that, it's a very decent camera for the price and I've had no issues so far. Crisp, clean and amazing photos; both in auto and manual modes.
Was this review helpful to you?
|
|
|
|
Five Stars, January 23, 2016
By Jack Etheredge
|
|
Great camera. Lots to learn but I am having fun learning it.
Was this review helpful to you?
|
|
|
|
|
|
|